Adding a Camera Area
Talkers in the Camera Area are detected and output as location data.
- The camera can be pointed at the talker based on output location data.
- Camera operation requires that location data be received and processed by the camera.
- Up to 15 Camera Areas can be set for each microphone.
-
Select a microphone in the main area.
The microphone settings screen appears.
-
Click “Camera”.

-
Click “Camera Area”.
- With each click, the mode for adding a Camera Area is turned on/off.
- The mode for adding a Camera Area can be turned off by right-clicking in the microphone pickup area or by pressing the Esc key on the keyboard.

The mode for adding a Camera Area is turned on.
-
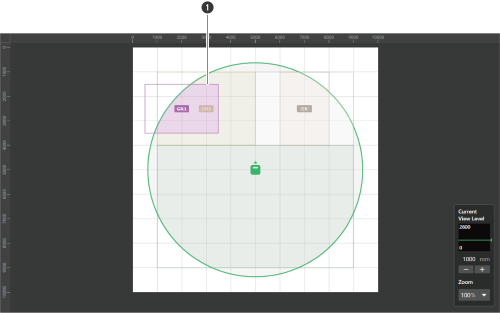
Add a Camera Area by dragging it within the microphone pickup area.
- Camera Areas cannot be added outside the microphone pickup area.
- Camera Areas cannot overlap.

- Camera Area
The added Camera Area is selected and “Camera Area” appears in the context panel.
-
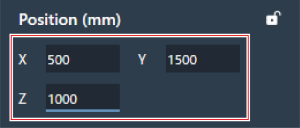
Adjust the position of the Camera Area.
- Under “Position”, enter the height from the floor in “Z” and the position from the origin point using “X” (horizontal direction) and “Y” (vertical direction).
- In the main area, the Camera Area can also be dragged to change its position.

-
Adjust the size of the Camera Area.
- Under “Size”, enter the size of the Camera Area using “W” (Width) and “D” (Depth).
- In the main area, the point in the corner of the Camera Area can also be dragged to resize the image.
